Bundling Multiple Apps in One Package To Be Uploaded to the Mac App Store

There are times for one app and there are times for multiple apps. And there are times for multiple apps within one app. Throughout my journey as a Hobby-Mac-Developer, I repeatedly faced situations that required me to split my Mac app into multiple smaller apps that should be bundled within a single package to be distributed in the App Store.
What’s the point of having multiple Apps in one?
Alfred is doing this, for instance. The primary use case of Alfred is a Spotlight-Like text input that stays in the background until needed. Most of the time, it’s running silently as a menu bar app. When opening the Settings, though, a new application opens that lives in the dock and can be closed via ⌘+Q like any other regular application. Since Alfred’s settings are quite wide-ranging, having them as a separate app makes total sense.
I did the same thing for my own menu bar application since I’m planning to add more settings that would extend the scope of a simple menu bar app. Check it out if you’re interested. It’s called HokusFokus and helps you focus better on the currently active application by fading out all the clutter on your desktop. https://apps.apple.com/app/hokusfokus/id1659087771
Enough skirmishing! Let’s get to work!
Creating your second target
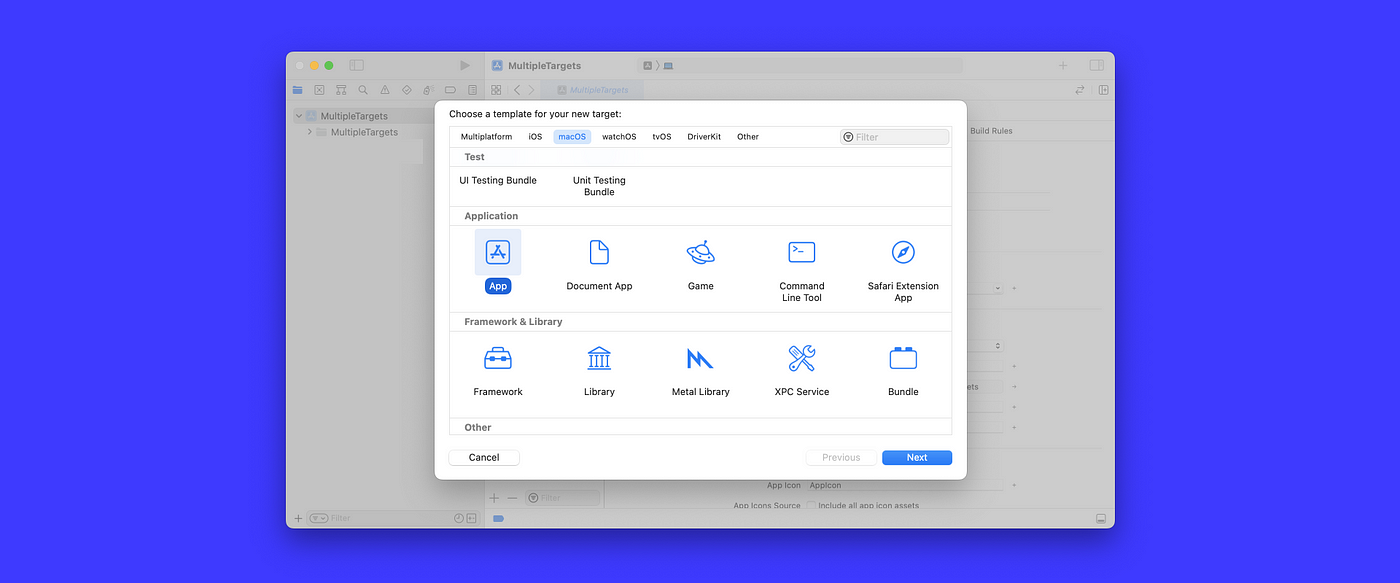
Before we can bundle multiple apps into one, we’ve got to have multiple apps. This is super straightforward. You add a second or third app to your project by going to file→ new → Target… and select App from the template picker.
Piece of cake!
Bundling targets together
If you now try to archive one of the targets, you'll notice that the other app is nowhere to be seen. This is because right now, XCode treats these two apps as two entirely separate entities, even though they are part of the same project.
We have to tell XCode to bundle them together first to get the desired outcome. This can be done by adding another Build step to the Build Settings of your main app. Which one of the targets is your main app depends on your individual use case. If one of the apps is solely used as a launcher for the other one, the latter one most certainly can be considered the main app. If your app foremost is a menu bar application with an additional settings app, the first one should be the target of choice.
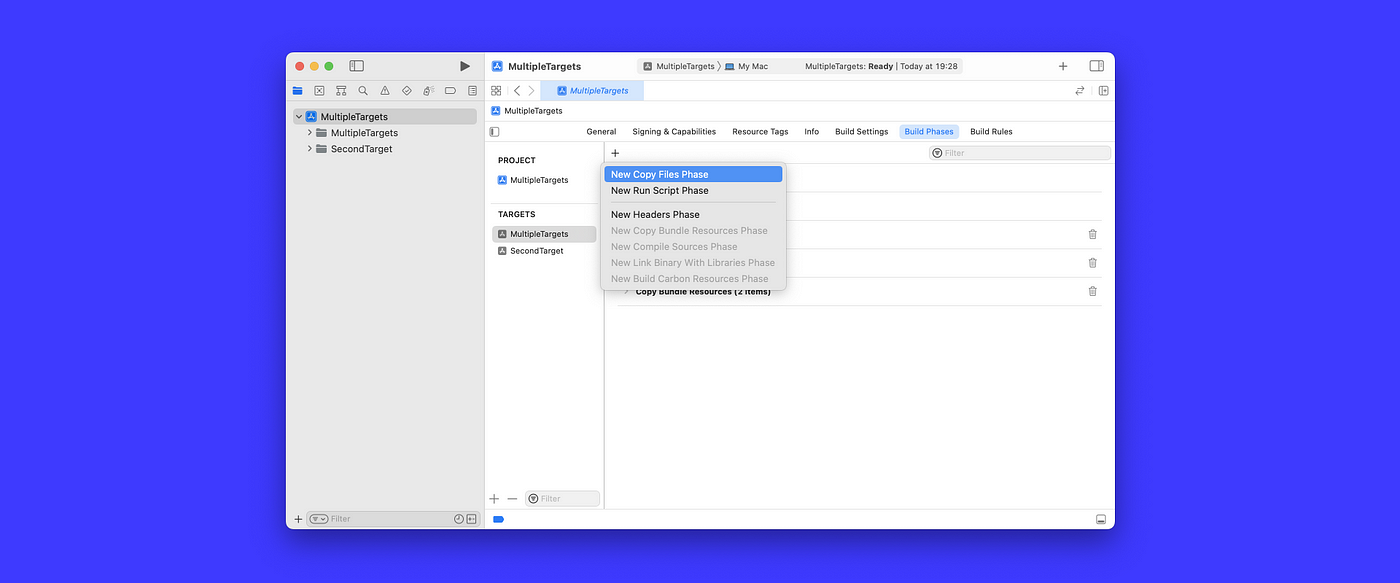
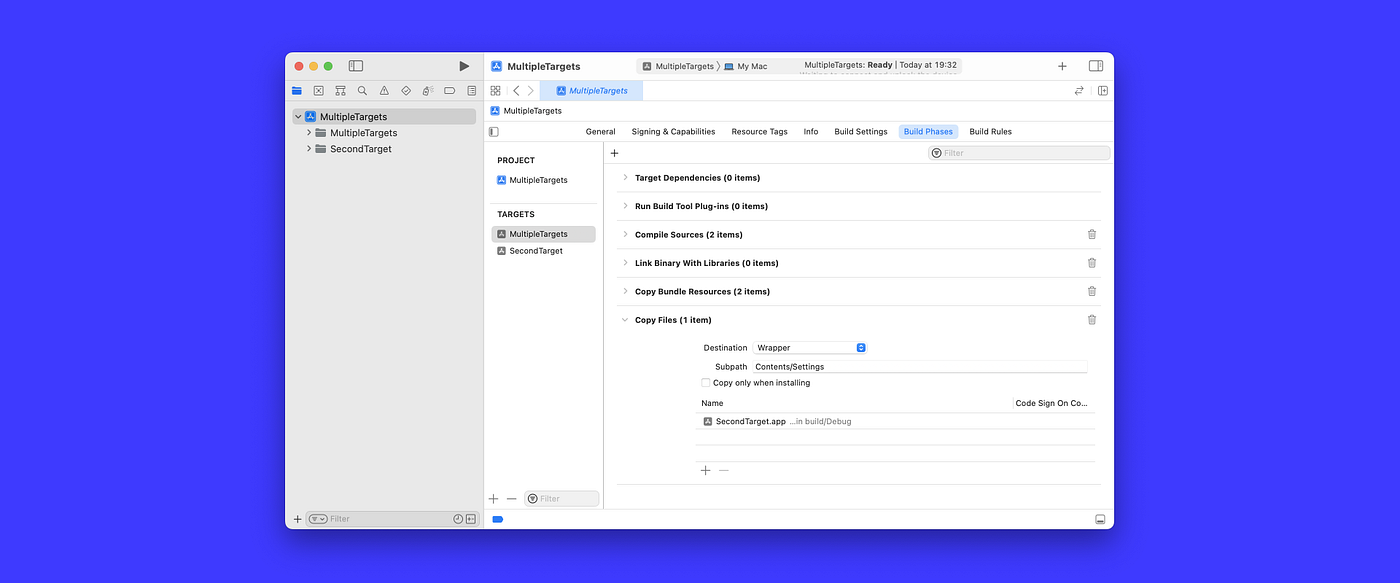
To add a build phase, go to the Build Phases of your freshly created main app, hit the + button (add a new build phase), and select New Copy Files Phase.
Expand the newly created Copy Files step and edit the settings. You might want to stick to the following:
- Destination: This is where the second target will be copied to within the bundle during the build process. Choose Wrapper and specify the Subpath. This can be virtually anything. As far as I’m concerned, the convention is to lead with Contents followed by a Folder name that suits the child app. In this example, I went for a settings app for the main application (/Contents/Settings).
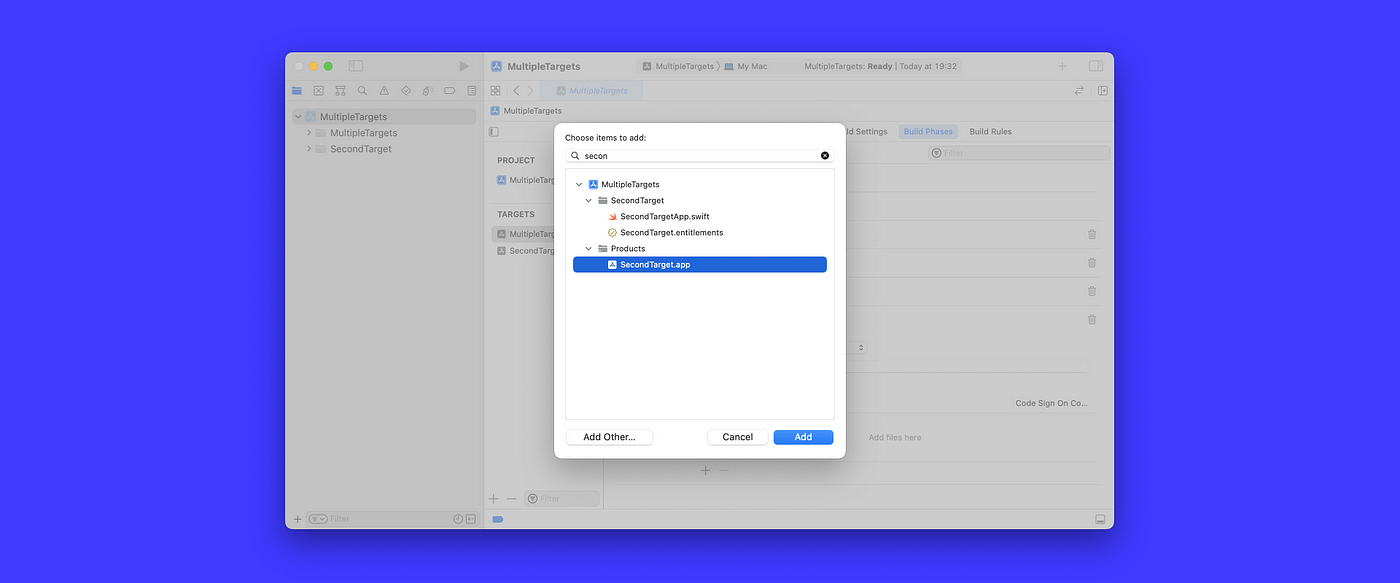
- Adding the target: Now, in order to add the target, click the + button below the Add files here section and select your target. If you search for it, you’ll find it in the Products section.
In the end, your setup should look a lot like this.
Archiving the app
We’re almost done, but there is one small detail remaining. If we Archive the main app now, the result will look similar to this.
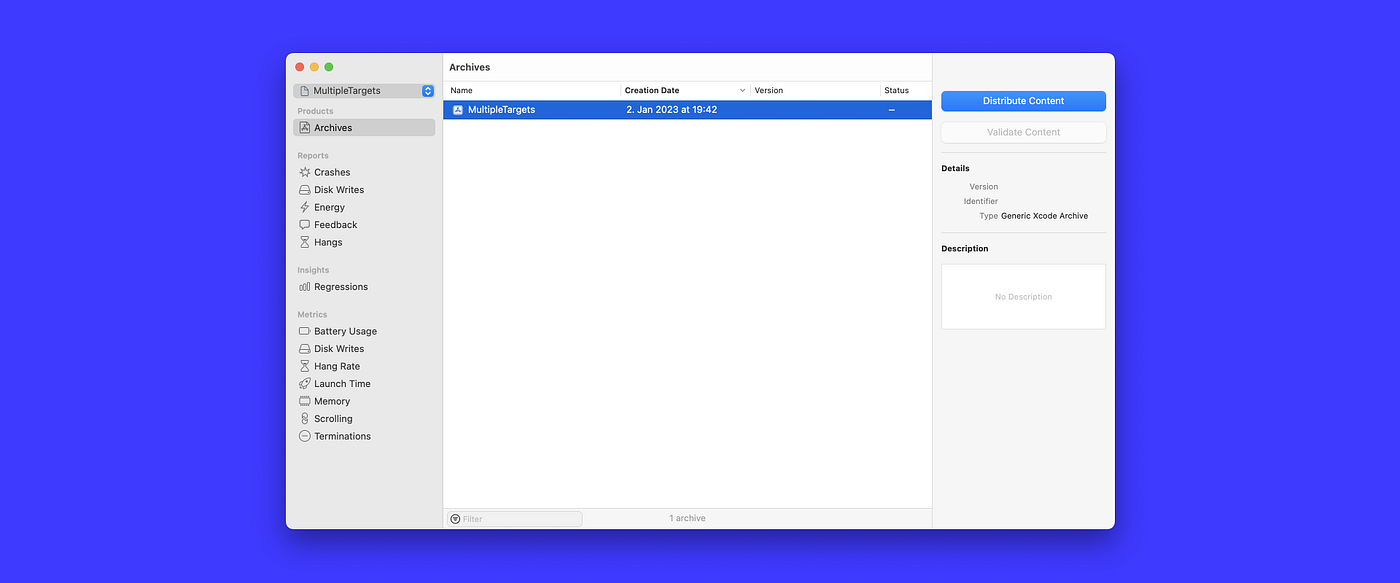
Wait a second! The type is Generic Archive?! That’s not what we want! What we want is a proper macOS App Archive that can be uploaded to the App Store. So, what’s going on here? If we’d export this Generic Archive we basically get a folder containing both of our targets as two separate apps. What we want, though, is one app that contains multiple targets, but looks like a single package to our customers and Apple.
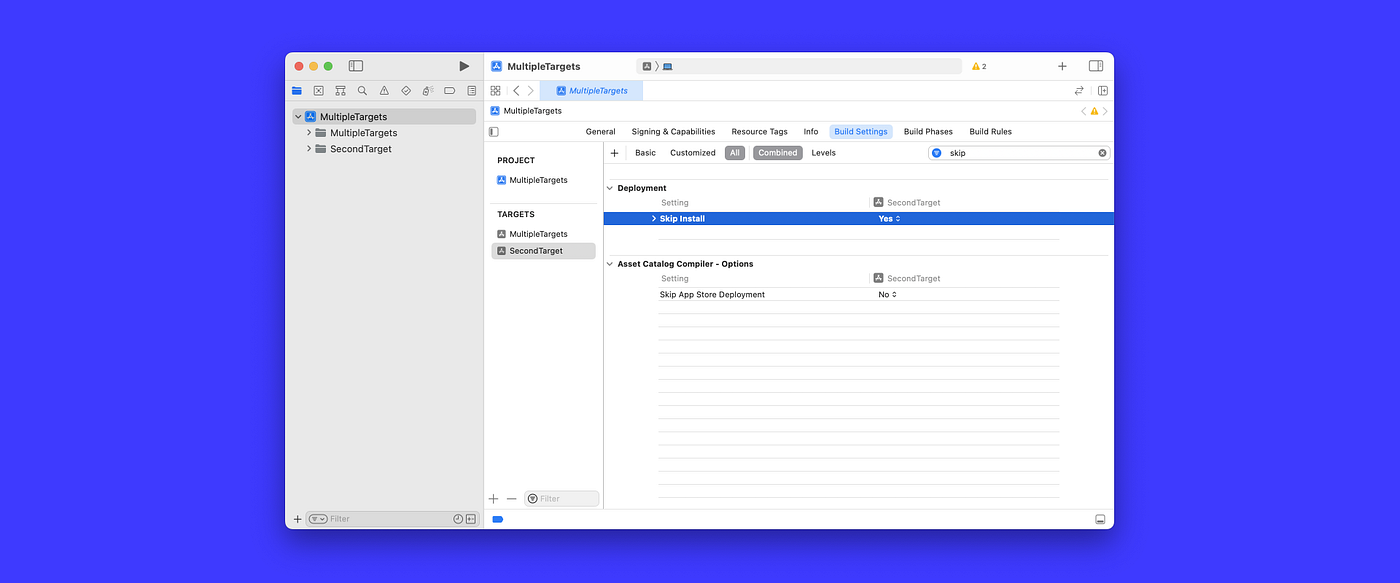
To achieve this, go to the target settings of your secondary app this time and navigate to the Build Settings tab. Here, search for Skip Install and set it to TRUE. Skipping the installation will make your secondary target part of your main bundle rather than its own standalone application, which is exactly what we want.
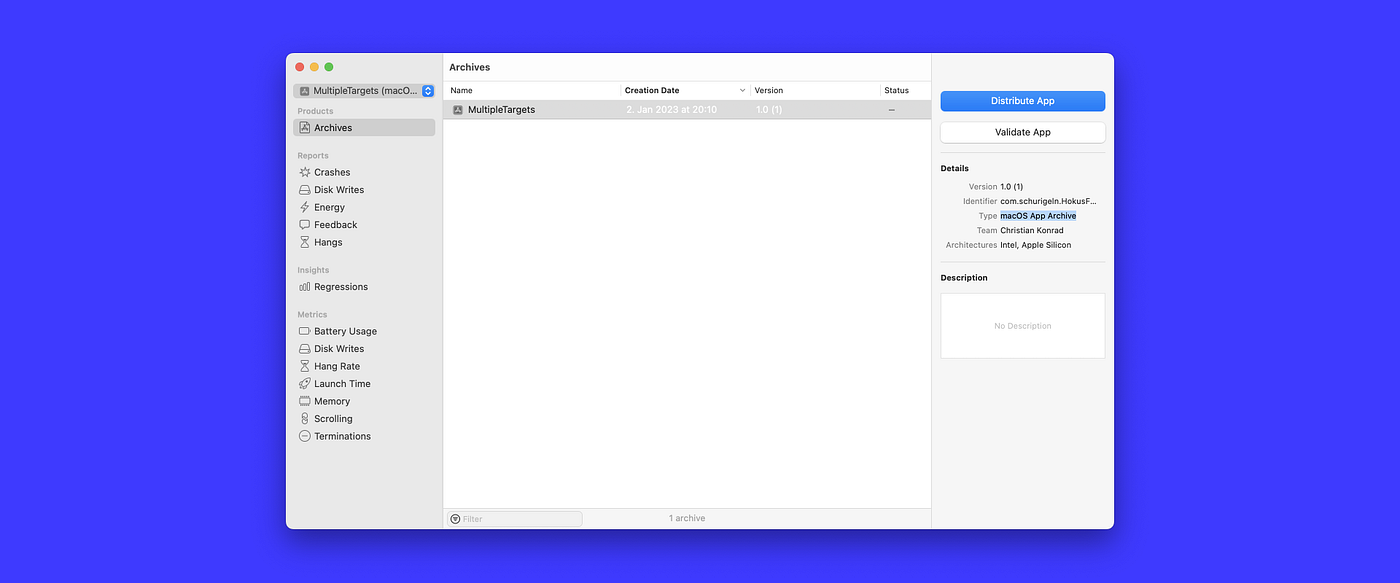
Archiving the main target again will finally lead to the desired result: A proper macOS App Archive ready to be uploaded to the App Store.
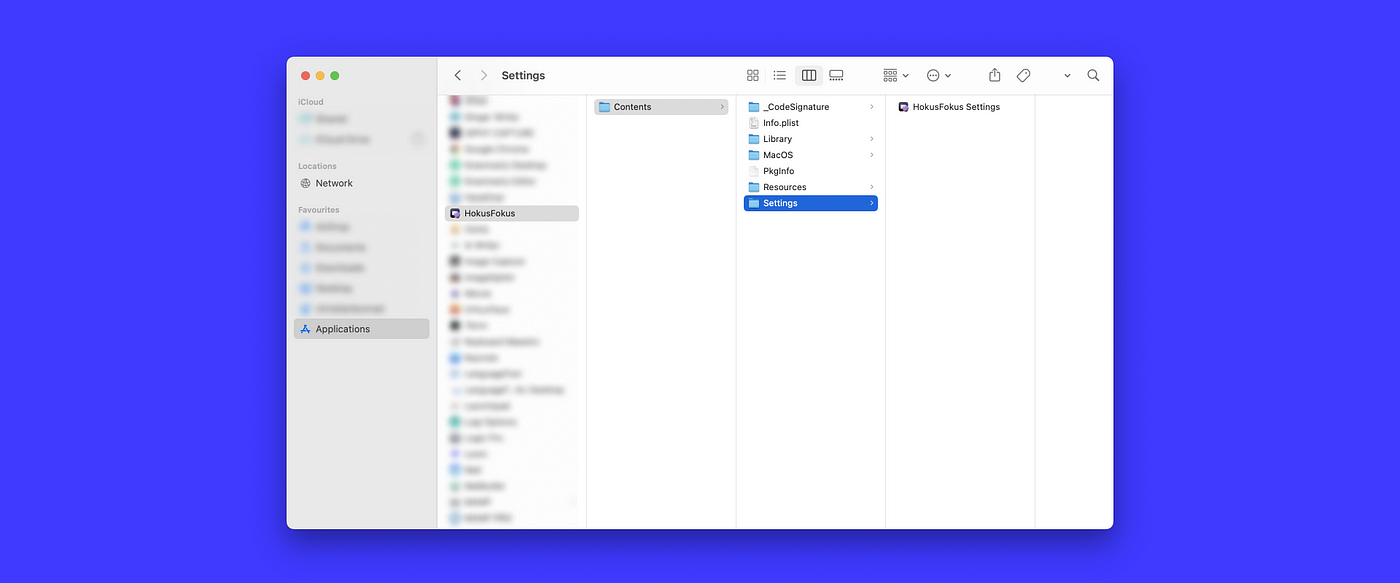
Inspecting the Bundle
Before we upload, we want to marvel at the results of our hard work. Right-click on the exported app and select Show Package Contents. If done correctly, you can now see the path we’ve created earlier laid out in front of our eyes. An app bundled in the package of another app ✨.
Happy Coding!
XOXO, Christian 👨🏻💻